我正在参加「掘金·启航计划」
前言
这里先声明一下本项目是基于github.com/wufan-tb/yo… 做的一个二次开发,也就是进行一个项目改造,同时针对原项目进行优化。
在原项目中,采用单线程流线操作,导致无法进行真正的实时的多目标在线检测。只能通过已有的视频文件进行检测。同时在运算过程中,计算资源消耗较大,在进行真正的在线推理时将导致卡顿。为此,为了能够更好地是完成任务。本文博主,在花费一天的时间仔细阅读其源码后,进行了新一轮的定制修改。
支持了在线视频检测,也就是支持:
cam = cv.VideoCapture(0)
同时,这里我将前天做好的人脸检测模块一起放置在了这里:
GitHub:
github.com/Huterox/Rea…
Gitee:
gitee.com/Huterox/Rea…
里面包含了完整的权重文件,无需进行下载新的权重文件。
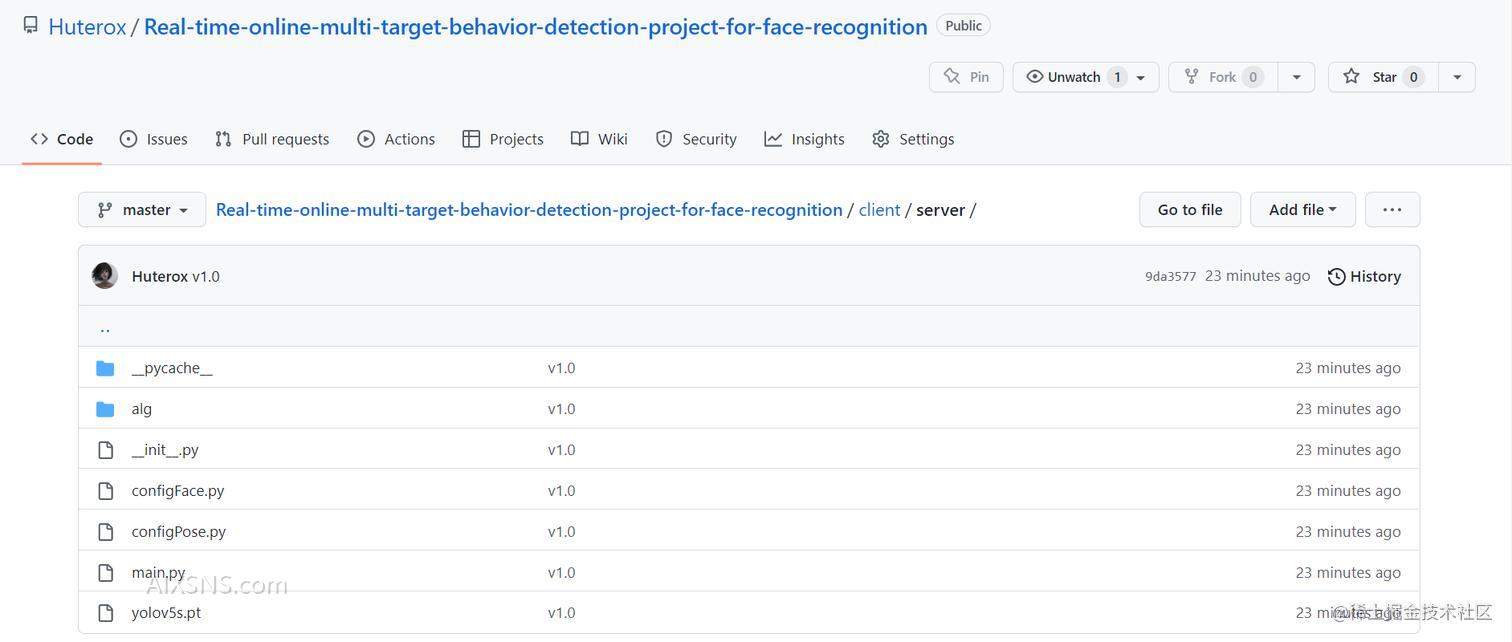
配置项
为了方便管理和统一,我们这边单独将配置文件给提取出来了。主要是项目当中的这两个文件:
分别用于管理人脸识别以及多目标的行为检测。
这里需要声明的是,如果需要进行二次开发的话,那么这里请将你的实现模块,放置在与config相同的目录下面,进行开发,原因的话,很简单,python目录的问题。
人脸识别配置
import dlib
import os
"""
人脸识别配置
"""
class FACE_FILE(object):
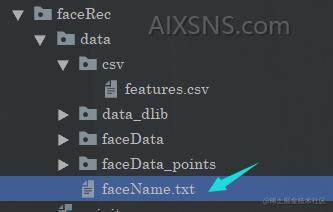
shape_predictor_path='alg/faceRec/data/data_dlib/shape_predictor_68_face_landmarks.dat'
recognition_model_path='alg/faceRec/data/data_dlib/dlib_face_recognition_resnet_model_v1.dat'
csv_base_path='alg/faceRec/data/csv/features.csv'
faceData_path='alg/faceRec/data/faceData/'
points_faceData_path='alg/faceRec/data/faceData_points/'
faceName_path='alg/faceRec/data/faceName.txt'
imgs_folder_path=os.listdir("alg/faceRec/data/faceData/")
font_path = "alg/fonts/MSYH.ttc"
FACE_CONFIG={
"max_collection_image": 50,
"get_points_faceData_flag": True,
"import_all_features_flag":True,
"face_needTo_update":[x for x in range(1, 2)], #选择更新脸部的编号,从0开始
"num_of_person_in_lib":len(FACE_FILE.imgs_folder_path),
"recognition_threshold":0.43,
"predictor": dlib.shape_predictor(FACE_FILE.shape_predictor_path),
"recognition_model": dlib.face_recognition_model_v1(FACE_FILE.recognition_model_path),
"detector":dlib.get_frontal_face_detector(),
}
人脸识别的模块非常简单,首先的话,首先就是我们的配置路径,例如,我们存入人脸信息的文件地址,还有一些字体文件啥的。
多目标行为检测配置
之后是我们多目标的一个行为检测模块。
"""
目标检测配置
"""
import os


class DECTION_CONFIG():
    #test imgs folder or video or camera
    input_date = r"C:Users31395DesktoppeoplePosetempyolo_slowfastvideotest_person.mp4"
    #folder to save result imgs, can not use input folder,视频保存路径
    output = "output/video/"
    #inference size (pixels)
    yolo_imsize = 640
    #object confidence threshold
    yolo_conf = 0.4
    #IOU threshold for NMS
    yolo_iou = 0.4
    #cuda device, i.e. 0 or 0,1,2,3 or cpu
    yolo_device = "cuda"
    #默认已经设置好了是cooc数据集
    yolo_classes = None

    yolo_weight = ""

    #10 ~ 30 should be fine, the bigger, the faster
    solowfast_process_batch_size = 25
    # set 0.8 or 1 or 1.2
    solowfast_video_clip_length = 1.2
    #usually set 25 or 30
    solowfast_frames_per_second = 25

    data_mean = [0.45, 0.45, 0.45]
    data_std = [0.225, 0.225, 0.225]

    deepsort_ckpt = "alg/poseRec/deep_sort/deep_sort/deep/checkpoint/ckpt.t7"
    deepsort_pb = "alg/poseRec/selfutils/temp.pbtxt"

    streamTempBaseChannel = "/alg/poseRec/data/tempChannel"

    # 设置实时处理的FPS
    realTimeFps = 20
    # 最大队列长度
    max_queue_size = 512
    # 每2秒左右存储一次视频,用于实时视频检测
    tempStream = 2
首先的话,由于我是在刚刚提到的那个项目的基础上进行自己整合开发的,所以的话,这里保留了他们原先的项目配置,新增了自己的一些配置,首先是关于yolo的一些配置,然后是slowfast的一些配置,那么deepsort的配置的话,在deep sort 那个文件夹下面,这个的话我们不需要进行改动。
这里主要说一下我们新增的配置。(有中文注释部分)。
因为我们这边是做了一个实时在线检测的,但是呢,由于这个原项目,一开始就是做视频读取进行识别的,同时,slowfast ,deepsort都是一个需要时间序列的算法,也就是说需要将一组图像输入到网络然后进行预测的算法,并且处理的速度非常慢,因此为了放置摄像头画面被吞了,我们这边就只能去开多线程去维护一个实时的状态。
因为如果不开多线程的话,会导致什么问题呢,就是时间从1~10,假设在第5秒的时候要进行处理,那么处理的时间是4秒,等你处理完了已经到了第10秒了(第九秒末)中间4秒发生的事情就没了。所以如果做实时,那么处理的效率就必须上去,这个堆设备去,但是在设备能力不行的情况下,我们能够做的就是减少画面的缺失,也就是做一个异步操作。那么这里我选择了python的多线程来实现,为什么不是多进程呢,多进程的确可以加快进度,因为GIL的存在。但是考虑到,我们期望是尽可能减少资源消耗的情况下,去不遗漏画面,所以的话,这里我们就只是用线程去做。一核有难总比八核有难要好一点。
人脸识别模块
🆗,那么我们接下来先看一下我们的人脸识别模块,这个的话其实先前是介绍了的。不过后面我们又做了点改动。那就是支持中文了,因为opencv是不支持中文的。然后的话,我们的模块如下:

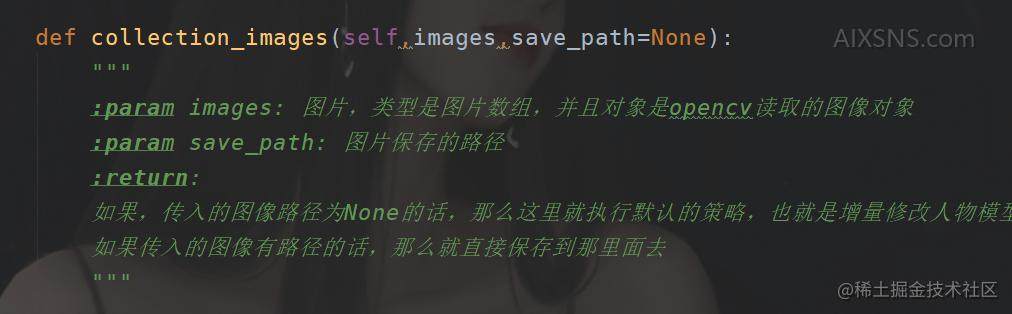
采集模块
首先的话还是我们的人脸采集模块,在collection当中我们提供了一个方法:
    cam = cv.VideoCapture(0)
    Collection().collection_cramer(cam)
    cam.release()
    cv.destroyAllWindows()
    print("采集完毕,程序退出!!")
这个方法支持直接从摄像头或者视频当中进行采集。当然我们同样也有一个直接从图片当中进行采集的方法
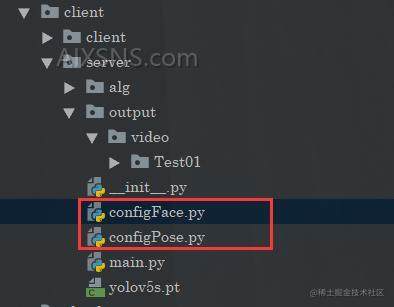
之后采集完毕之后的话,在这个目录下面(可以在配置中设置)
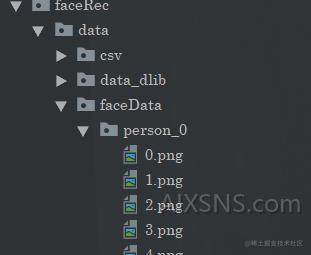
看到采集到的“大头”照
人脸存储模块
之后的话,我们要做的就是把这些人脸进行一个特征识别,然后呢,将这些特征进行保存。
"""
负责读取采集到的人脸图像,然后去构建人脸对应的信息
"""
import cv2 as cv
import os
import numpy as np
import csv

from tqdm import tqdm
import shutil
from client.server.configFace import FACE_FILE,FACE_CONFIG

class BuildFace():

    def write2csv(self,data, mode):
        """
        更新csv文件当中的数据(这里面存储的是我们人脸的特征)
        :param data:
        :param mode:
        :return:
        """
        with open(FACE_FILE.csv_base_path, mode, newline='') as wf:
            csv_writer = csv.writer(wf)
            csv_writer.writerow(data)

    def get_features_from_csv(self):

        features_in_csv = []
        with open(FACE_FILE.csv_base_path, 'r') as rf:
            csv_reader = csv.reader(rf)
            for row in csv_reader:
                for i in range(0, 128):
                    row[i] = float(row[i])

                features_in_csv.append(row)
            return features_in_csv

    def save_select_in_csv(self,data):
        """
        选择性更新人脸数据
        :param data:
        :return:
        """
        features_in_csv = self.get_features_from_csv()
        with open(FACE_FILE.csv_base_path, 'w', newline='') as wf:
            csv_writer = csv.writer(wf)
            for index, i in enumerate(FACE_CONFIG.get("face_needTo_update")):
                features_in_csv[i] = data[index]
            csv_writer.writerow(features_in_csv[0])

        with open(FACE_FILE.csv_base_path, 'a+', newline='') as af:
            csv_writer = csv.writer(af)
            for j in range(1, len(features_in_csv)):
                csv_writer.writerow(features_in_csv[j])

        print("csv文件更新完成!!")

    def get_128_features(self,person_index):
        """
        :param person_index:  person_index代表第几个人脸数据文件夹
        :return:
        """
        num = 0
        features = []
        imgs_folder = FACE_FILE.imgs_folder_path[person_index]
        points_faceImage_path = FACE_FILE.points_faceData_path + imgs_folder

        imgs_path = FACE_FILE.faceData_path + imgs_folder + '/'
        list_imgs = os.listdir(imgs_path)
        imgs_num = len(list_imgs)

        if os.path.exists(FACE_FILE.points_faceData_path + imgs_folder):
            shutil.rmtree(points_faceImage_path)
        os.makedirs(points_faceImage_path)
        print("人脸点图文件夹建立成功!!")
        with tqdm(total=imgs_num) as pbar:
            pbar.set_description(str(imgs_folder))
            for j in range(imgs_num):
                image = cv.imread(os.path.join(imgs_path, list_imgs[j]))

                faces = FACE_CONFIG.get("detector")(image, 1)
                if len(faces) != 0:
                    for z, face in enumerate(faces):
                        shape = FACE_CONFIG.get("predictor")(image, face)
                        w, h = (face.right() - face.left()), (face.bottom() - face.top())
                        left, right, top, bottom = face.left() - w // 4, face.right() + w // 4, face.top() - h // 2, face.bottom() + h // 4
                        im = image
                        cv.rectangle(im, (left, top), (right, bottom), (0, 0, 255))
                        cv.imwrite(points_faceImage_path + 'https://b2.7b2.com/{}.png'.format(j), im)

                        if (FACE_CONFIG.get("get_points_faceData_flag") == True):
                            for p in range(0, 68):
                                cv.circle(image, (shape.part(p).x, shape.part(p).y), 2, (0,0,255))
                            cv.imwrite(points_faceImage_path + 'https://b2.7b2.com/{}.png'.format(j), image)
                        the_features = list(FACE_CONFIG.get("recognition_model").compute_face_descriptor(image, shape)) # 获取128维特征向量
                        features.append(the_features)
                        num += 1
                pbar.update(1)
        np_f = np.array(features)
        res = np.median(np_f, axis=0)
        return res

    def building_form_config(self):

        if (FACE_CONFIG.get("import_all_features_flag") == True):
            self.building_all()
        else:
            peoples = FACE_CONFIG.get("face_needTo_update")
            self.building_select(peoples)

    def building_all(self):
        res = self.get_128_features(person_index=0)
        self.write2csv(res, 'w')
        for i in range(1, FACE_CONFIG.get("num_of_person_in_lib")):
            res = self.get_128_features(person_index=i)
            self.write2csv(res, 'a+')

    def building_select(self,peoples):
        """
        更新某几个人脸,传入对应的下标编号,例如:[0,2,4]
        :param peoples:
        :return:
        """
        select_res = []
        for i in peoples:
            res = self.get_128_features(person_index=i)
            select_res.append(res)
        self.save_select_in_csv(select_res)
这里同样也是提供了多个方法,局部更新和全局更新都有。
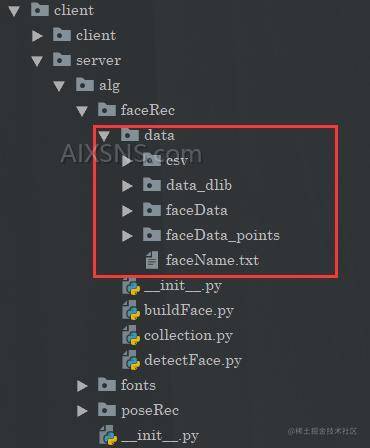
那么同样的,我们将人脸的信息保存在这里:

同时你还需要把人脸对应的名字写在这里:
记住这里的特征和人名是一一对应的。当然你也可以考虑优化一下用别的东西存储,或者直接写入到配置当中去。又或者存入数据库当中。
识别模块
之后就是我们做人脸识别的做法。
人脸识别的过程其实和我们的人脸采集过程非常相似,不同的是,当新的人脸过来之后,我们计算他的特征向量与我们已有的特征向量进行一个比对。然后得到相似度最高的那个。
在这里我主要说明两个比较重要的方法,
第一个就是这个:
   def detect_from_cam(self,camera):
        """
        这里的话,和我们采集是一样的,就是传入这个camera对象就好了
        :return:
        """
        while camera.isOpened() and not self.quit_flag:
            val, self.image = camera.read()
            if val == False: continue
            key = cv.waitKey(1)

            res = self.face_detecting()  # 0.038s

            if res is not None:
                face, self.all_face_location = res
                for i in range(self.face_num):
                    [left, right, top, bottom] = self.all_face_location[i]
                    self.middle_point = [(left + right) / 2, (top + bottom) / 2]

                    self.face_img = self.image[top:bottom, left:right]

                    cv.rectangle(self.image, (left, top), (right, bottom), (0, 0, 255))

                    shape = FACE_CONFIG.get("predictor")(self.image, face[i])  # 0.002s

                    if self.face_num_change_flag == True or self.check_times <= 5:
                        if self.face_num_change_flag == True:  # 人脸数量有变化,重新进行五次检测
                            self.check_times = 0
                            self.last_now_middlePoint_eDistance = [66666 for _ in range(self.available_max_face_num)]
                            for z in range(self.available_max_face_num):
                                self.check_features_from_cam[z] = []

                        if self.check_times < 5:
                            the_features_from_cam = list(
                                FACE_CONFIG.get("recognition_model").compute_face_descriptor(self.image, shape))
                            if self.check_times == 0:  # 初始帧
                                self.check_features_from_cam[i].append(the_features_from_cam)
                                self.last_frame_middle_point[i] = self.middle_point
                            else:
                                this_face_index = self.track_link()  # 后续帧需要与初始帧的人脸序号对应
                                self.check_features_from_cam[this_face_index].append(the_features_from_cam)

                        elif self.check_times == 5:
                            features_after_filter = self.middle_filter(self.check_features_from_cam[i])
                            self.check_features_from_cam[i] = []
                            for person in range(FACE_CONFIG.get("num_of_person_in_lib")):
                                e_distance = self.calculate_EuclideanDistance(self.all_features[person],
                                                                              features_after_filter)

                                self.all_e_distance[i].append(e_distance)

                            if min(self.all_e_distance[i]) < FACE_CONFIG.get("recognition_threshold"):
                                self.person_name[i] = self.all_name[
                                    self.all_e_distance[i].index(min(self.all_e_distance[i]))]
                                # cv.putText(self.image, self.person_name[i],
                                #            (int((left + right) / 2) - 50, bottom + 20),
                                #            cv.FONT_HERSHEY_SIMPLEX, 0.75, (0, 0, 255), 2)
                                self.image = self.cv2_add_chinese_text(self.image, self.person_name[i],
                                                                       (int((left + right) / 2) - 50, bottom + 10),
                                                                       (0, 0, 255), 25)
                            else:

                                self.person_name[i] = "Unknown"
                    else:
                        this_face_index = self.track_link()
                        self.image = self.cv2_add_chinese_text(self.image, self.person_name[this_face_index],
                                   (int((left + right) / 2) - 50, bottom + 10),
                                   (0, 0, 255), 25)
                self.check_times += 1
                for j in range(self.available_max_face_num):
                    self.all_e_distance[j] = []
                """
                在这里的话,n,s是不会触发的,这里只是用一下这个q而已,也就是退出
                """
                self.key_scan(key)

            self.get_fps()
            cv.namedWindow('camera', 0)
            cv.imshow('camera', self.image)

        camera.release()
        cv.destroyAllWindows()
这个方法是从视频当中进行识别,这里设置时5张图片进行进行计算头像特征,然后进行对比。
那么同样对应的还有这个,直接从图片当中进行识别,但是这里时单张图片。
    def detect_from_image(self,image):

        """
        直接识别一张图片当中的人脸,这个开销是最小的,当然这个精确度嘛,没有直接读取视频好一点
        因为那个的话确定了好几帧的情况,这个的话只是单张图像的。返回的是一个图像的人名列表
        但是实际上的话,我们其实送入的图像其实只会有一个人头像,多目标检测,我们也是把一张图像
        对多个目标进行截取,然后进行识别,因为需要确定每个人物的序。
        :param image:
        :param show:
        :return:
        """
        self.image = image
        # self.image = cv.imread('.test_1.jpg')
        res = self.face_detecting()
        names = []
        if res is not None:
            face, self.all_face_location = res
            max_it = self.face_num if self.face_num < len(res) else len(res)
            for i in range(max_it):
                [left, right, top, bottom] = self.all_face_location[i]
                self.middle_point = [(left + right) / 2, (top + bottom) / 2]

                self.face_img = self.image[top:bottom, left:right]

                cv.rectangle(self.image, (left, top), (right, bottom), (0, 0, 255))

                shape = FACE_CONFIG.get("predictor")(self.image, face[i])

                the_features_from_image = list(
                    FACE_CONFIG.get("recognition_model").compute_face_descriptor(self.image, shape))
                e_distance = []
                for features in self.all_features:
                    e_distance.append(self.calculate_EuclideanDistance(the_features_from_image,
                                                     features))
                if(min(e_distance)<FACE_CONFIG.get("recognition_threshold")):
                    max_index = int(np.argmin(e_distance))
                    names.append(self.all_name[max_index])
        return names
目标行为检测模块
之后是我们的目标检测模块。那么这里的话,我们主要看到这个模块:
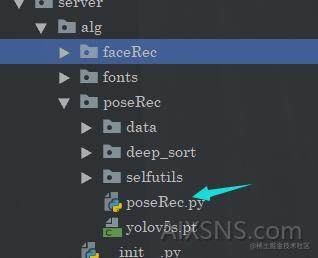
这个模块就是一个实现模块。
同样的这里有两个方法。一个是原先的非实时在线检测,还有一个就是我们自己实现的在线检测。
非在线实时检测
这个的话就是一开始给到的方法,这个方法适合对已经录下来了的视频进行操作,对这个视频进行处理,最后得到一个结果。
这里我进行过测试,我的设备是:
戴尔游匣G5
GTX 1650 4GB
对于一个14秒的视频,处理完毕之后大概大概3,40秒左右。
所以这个几乎不能做在线的检测,也就是打开摄像头,你需要实时监控摄像头的画面的那种情况。
    def detect_form_video(self,CameraName,show=False):

        """
        这里的代码执行流程是这样子的:
            1. 读取到视频当中所有的图像
            2. 先通过yolo算法,获取到多个目标
            3. 通过deep_sort对这些目标进行跟踪
            4. 通过slowfast识别出对应的目标动作
            5. 调用visualize_yolopreds处理出识别出来的结果,同时绘制图像
            6. 将处理完毕之后的视频,再次进行合并为一个视频,并输出到指定文件中
        这里有个毛病就是,需要在处理完一个batch之后,你才能看到这个视频,并且每次都有卡顿
        这里实现的方式有延迟.
        :param CameraName:
        :return:
        """

        # self.model = torch.hub.load('path/to/yolov5', 'custom', path='path/to/best.pt', source='local')

        if DECTION_CONFIG.yolo_classes:
            self.model.classes = DECTION_CONFIG.yolo_classes


        # 读取视频
        video_path = DECTION_CONFIG.input_date
        # pytorch提供的动作识别器

        video = pytorchvideo.data.encoded_video.EncodedVideo.from_path(video_path)

        img_path= DECTION_CONFIG.streamTempBaseChannel+"/"+CameraName+"/01"
        self.clean_folder(img_path)
        os.makedirs(img_path,exist_ok=True)
        print("extracting video...")
        # 对视频进行切分为图片
        self.extract_video(video_path,img_path)
        imgnames=natsort.natsorted(os.listdir(img_path))

        save_path=DECTION_CONFIG.streamTempBaseChannel+"/"+CameraName+"/02"
        self.clean_folder(save_path)
        os.makedirs(save_path,exist_ok=True)

        process_batch_size = DECTION_CONFIG.solowfast_process_batch_size    # 10 ~ 30 should be fine, the bigger, the faster
        video_clip_length = DECTION_CONFIG.solowfast_video_clip_length   # set 0.8 or 1 or 1.2
        frames_per_second = DECTION_CONFIG.solowfast_frames_per_second     # usually set 25 or 30
        print("processing...")
        a=time.time()
        for i in range(0,len(imgnames),process_batch_size):
            imgs=[os.path.join(img_path,name) for name in imgnames[i:i+process_batch_size]]
            yolo_preds=self.model(imgs, size=self.imsize)
            mid=(i+process_batch_size/2)/frames_per_second
            video_clips=video.get_clip(mid - video_clip_length/2, mid + video_clip_length/2 - 0.04)
            video_clips=video_clips['video']
            if video_clips is None:
                continue
            print(i/frames_per_second,video_clips.shape,len(imgs))
            deepsort_outputs=[]
            for i in range(len(yolo_preds.pred)):
                temp=self.deepsort_update(self.deepsort_tracker,yolo_preds.pred[i].cpu(),yolo_preds.xywh[i][:,0:4].cpu(),yolo_preds.ims[i])
                if len(temp)==0:
                    temp=np.ones((0,8))
                deepsort_outputs.append(temp.astype(np.float32))
            yolo_preds.pred=deepsort_outputs
            id_to_ava_labels={}
            if yolo_preds.pred[len(imgs)//2].shape[0]:
                inputs,inp_boxes,_= self.ava_inference_transform(video_clips,yolo_preds.pred[len(imgs)//2][:,0:4],crop_size=self.imsize)
                inp_boxes = torch.cat([torch.zeros(inp_boxes.shape[0],1), inp_boxes], dim=1)
                if isinstance(inputs, list):
                    inputs = [inp.unsqueeze(0).to(self.device) for inp in inputs]
                else:
                    inputs = inputs.unsqueeze(0).to(self.device)
                with torch.no_grad():
                    slowfaster_preds = self.video_model(inputs, inp_boxes.to(self.device))
                    slowfaster_preds = slowfaster_preds.cpu()
                for tid,avalabel in zip(yolo_preds.pred[len(imgs)//2][:,5].tolist(),np.argmax(slowfaster_preds,axis=1).tolist()):
                    id_to_ava_labels[tid]=self.ava_labelnames[avalabel+1]

            self.visualize_yolopreds(yolo_preds,id_to_ava_labels,self.coco_color_map,save_path,show)

        print("total cost: {:.3f}s, video clips length: {}s".format(time.time()-a,len(imgnames)/frames_per_second))

        vide_save_path = DECTION_CONFIG.output+CameraName
        if(not os.path.exists(vide_save_path)):
            os.makedirs(vide_save_path)
        vide_save_path = vide_save_path+"/"+CameraName+".mp4"
        img_list=natsort.natsorted(os.listdir(save_path))
        im=cv2.imread(os.path.join(save_path,img_list[0]))
        height, width = im.shape[0], im.shape[1]
        video = cv2.VideoWriter(vide_save_path,cv2.VideoWriter_fourcc(*'mp4v'), 25, (width,height))

        for im_name in img_list:
            img = cv2.imread(os.path.join(save_path,im_name))
            video.write(img)
        video.release()

        self.clean_folder(img_path)
        self.clean_folder(save_path)
        print('saved video to:', vide_save_path)
在线实时检测
之后就是这个在线的检测。这个在线的意思不是说,处理速度非常快,这个毕竟硬件就摆在那里不可能有加速的。所以的话,我们唯一可以做的就是不遗漏,那么要想实现这个就只能做异步处理了。那么我在这里做了一个简单的消费者生产者模型,来实现这个功能。
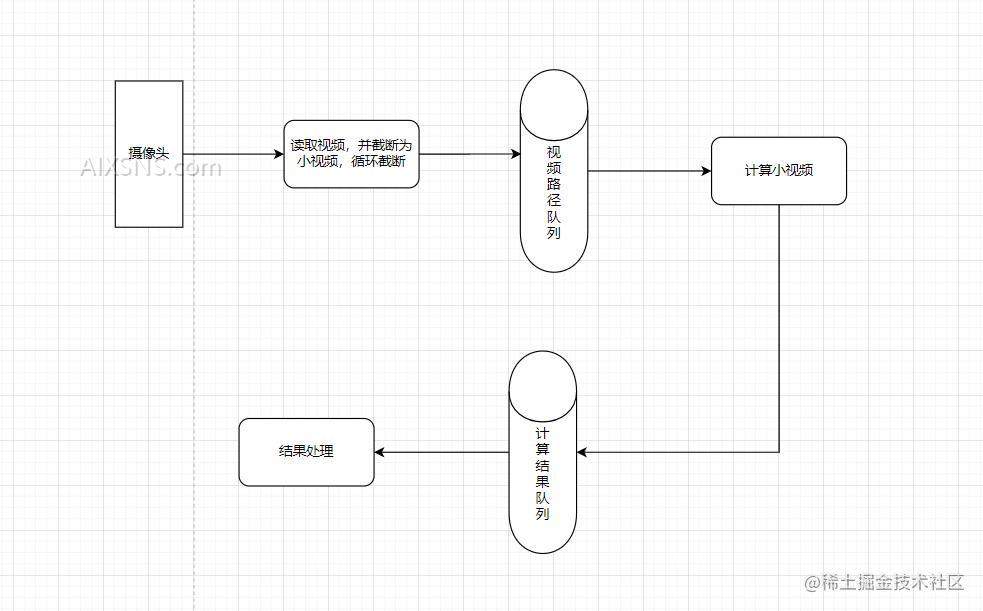
这里也就是两个队列。
这样的话就可以实现这个在线实时的功能。
 def readTimeCamera(self,video_path,CameraName):
        """
        读取摄像头,并且按照帧数读取,并且把这读取的图像
        先合成视频,因为这边会用到这个pytorchvideo优化
        :param CameraName:
        :return:
        """

        def readCamera(video_path,CameraName):

            camera = cv2.VideoCapture(video_path)
            wait_time = int((1 / DECTION_CONFIG.realTimeFps) * 1000)
            count = 0
            imgs = []
            split_count = 0
            try:
                while camera.isOpened() and self.going:
                    success,img = camera.read()
                    imgs.append(img)
                    count+=1
                    if(count==DECTION_CONFIG.realTimeFps*DECTION_CONFIG.tempStream):
                        # 此时读取了长度为tempStream秒的视频
                        vide_save_path = DECTION_CONFIG.output + CameraName
                        if (not os.path.exists(vide_save_path)):
                            os.makedirs(vide_save_path)
                        split_count+=1
                        # 这里达到队列长度之后进行重复覆盖
                        if(split_count==DECTION_CONFIG.max_queue_size):
                            split_count = 1
                        vide_save_path = vide_save_path + "/" + CameraName +"-"+str(split_count)+ ".mp4"

                        height = len(img)
                        width = len(img[0])
                        video = cv2.VideoWriter(vide_save_path, cv2.VideoWriter_fourcc(*'mp4v'),
                                                DECTION_CONFIG.realTimeFps, (width, height))
                        for img in imgs:
                            video.write(img)
                        video.release()
                        imgs = []
                        count=0
                        self.exitTempStreamVideo = True
                        # 如果没有消耗掉,这里会进行一个等待,阻塞
                        self.read_camera_videos.put(vide_save_path)
                    key = cv2.waitKey(wait_time)
                    if key == ord('q'):
                        self.going = False
                return
            except Exception as e:
                self.going = False
                print(e)
                return
            finally:
                camera.release()
                print("摄像头终止并释放")
                return

        """
        开启多线程进行调用
        """
        t = threading.Thread(target=readCamera,args=(video_path,CameraName,))
        t.start()
        # readCamera(video_path,CameraName)

    def readTimeProcessing(self,CameraName):
        """
        在这里完成算法处理
        :return:
        """
        def processing(CameraName):

            while(1):

                if(not self.going and self.read_camera_videos.empty()):
                    print("---计算完毕---")
                    self.finish_process = True
                    return

                # 加载识别类型
                if DECTION_CONFIG.yolo_classes:
                    self.model.classes = DECTION_CONFIG.yolo_classes
                # 加载路径视频
                if(self.read_camera_videos.empty() and not self.exitTempStreamVideo):
                    continue
                vide_path = self.read_camera_videos.get()
                # pytorch提供的动作识别器,就是因为这个所以我们还需要存储一下视频文件
                # 虽然会消耗IO的时间,但是这玩意有对视频的优化

                video = pytorchvideo.data.encoded_video.EncodedVideo.from_path(vide_path)
                # 这里还是和先前一样
                img_path = DECTION_CONFIG.streamTempBaseChannel + "/" + CameraName + "/01"
                self.clean_folder(img_path)
                os.makedirs(img_path, exist_ok=True)
                # 对视频进行切分为图片
                self.extract_video(vide_path, img_path)
                imgnames = natsort.natsorted(os.listdir(img_path))

                process_batch_size = DECTION_CONFIG.realTimeFps  # 10 ~ 30 should be fine, the bigger, the faster
                video_clip_length = DECTION_CONFIG.solowfast_video_clip_length  # set 0.8 or 1 or 1.2
                frames_per_second = DECTION_CONFIG.solowfast_frames_per_second  # usually set 25 or 30

                for i in range(0, len(imgnames), process_batch_size):
                    imgs = [os.path.join(img_path, name) for name in imgnames[i:i + process_batch_size]]
                    yolo_preds = self.model(imgs, size=self.imsize)
                    mid = (i + process_batch_size / 2) / frames_per_second
                    video_clips = video.get_clip(mid - video_clip_length / 2, mid + video_clip_length / 2 - 0.04)
                    video_clips = video_clips['video']
                    if video_clips is None:
                        continue
                    # print("*"*100)
                    # print(i / frames_per_second, video_clips.shape, len(imgs))
                    deepsort_outputs = []
                    for i in range(len(yolo_preds.pred)):
                        temp = self.deepsort_update(self.deepsort_tracker, yolo_preds.pred[i].cpu(),
                                                    yolo_preds.xywh[i][:, 0:4].cpu(), yolo_preds.ims[i])
                        if len(temp) == 0:
                            temp = np.ones((0, 8))
                        deepsort_outputs.append(temp.astype(np.float32))
                    yolo_preds.pred = deepsort_outputs
                    id_to_ava_labels = {}
                    if yolo_preds.pred[len(imgs) // 2].shape[0]:
                        inputs, inp_boxes, _ = self.ava_inference_transform(video_clips,
                                                                            yolo_preds.pred[len(imgs) // 2][:, 0:4],
                                                                            crop_size=self.imsize)
                        inp_boxes = torch.cat([torch.zeros(inp_boxes.shape[0], 1), inp_boxes], dim=1)
                        if isinstance(inputs, list):
                            inputs = [inp.unsqueeze(0).to(self.device) for inp in inputs]
                        else:
                            inputs = inputs.unsqueeze(0).to(self.device)
                        with torch.no_grad():
                            slowfaster_preds = self.video_model(inputs, inp_boxes.to(self.device))
                            slowfaster_preds = slowfaster_preds.cpu()
                        for tid, avalabel in zip(yolo_preds.pred[len(imgs) // 2][:, 5].tolist(),
                                                 np.argmax(slowfaster_preds, axis=1).tolist()):
                            id_to_ava_labels[tid] = self.ava_labelnames[avalabel + 1]

                    """
                    在这里,我们把这个结果放在队列当中
                    """
                    print("-" * 100)
                    print("已完成当前视频计算,剩余:",self.read_camera_videos.qsize())
                    print("-" * 100)
                    self.read_process_data.put((yolo_preds, id_to_ava_labels))
                    self.exitTempStreamVideo = False

        """
        开启多线程进行调用
        """
        t = threading.Thread(target=processing, args=(CameraName,))
        t.start()


    def readTime_visualize_yolopreds(self,CameraName,show=False,process=None):
        """
        显示yolo预测的结果,绘制图像,咱们在这里进行逻辑处理
        在这里如果需要进行逻辑处理的话,在这里传入一个process方法
        这个方法需要接收三个参数,第一个参数是,当前的动作,另一个是当前对象的bounding box 已经image对象
        :param yolo_preds:
        :param id_to_ava_labels:
        :param color_map:
        :param save_folder:
        :return:
        """
        def visulize_readTime(CameraName,show=False,process=None):

            while(1):
                if(self.finish_process and self.read_process_data.empty()):
                    print("---计算处理完毕---")
                    break
                data = self.read_process_data.get()

                print("*"*100)
                print("正在处理实时结果,剩余:",self.read_process_data.qsize())
                print("*" * 100)
                yolo_preds = data[0]
                id_to_ava_labels = data[1]
                for i, (im, pred) in enumerate(zip(yolo_preds.ims, yolo_preds.pred)):
                    im=cv2.cvtColor(im,cv2.COLOR_BGR2RGB)
                    if pred.shape[0]:
                        for j, (*box, cls, trackid, vx, vy) in enumerate(pred):
                            if int(cls) != 0:
                                ava_label = ''
                            elif trackid in id_to_ava_labels.keys():
                                ava_label = id_to_ava_labels[trackid].split(' ')[0]
                                """
                                在这里得到动作信息和对应的bounding box
                                并且处理一些逻辑
                                """
                                if(process!=None):
                                    process(im,ava_label,box)
                            else:
                                ava_label = 'Unknow'
                            text = '{} {} {}'.format(int(trackid),yolo_preds.names[int(cls)],ava_label)
                            color = self.coco_color_map[int(cls)]

                            im = self.plot_one_box(box,im,color,text)
                    if(show):
                        cv2.namedWindow('camera', 0)
                        cv2.imshow('camera',im)
                        cv2.waitKey(1)
            folder_name_temp = DECTION_CONFIG.output + CameraName
            if (os.path.exists(folder_name_temp)):
                shutil.rmtree(folder_name_temp)

            print("!"*100)
            print("视频处理完毕!")
            print("!" * 100)


        t = threading.Thread(target=visulize_readTime, args=(CameraName,show,process,))
        t.start()

    def detect_from_video_realTime(self,camera,CameraName,show=False,process=None):
        """
        这里需要传入一个camera对象,从而实现实时读取
        :param camera:
        :param CameraName:
        :param show:
        :param save_path:
        :return:
        """
        # 实时读取摄像头
        self.readTimeCamera(camera,CameraName)
        # 进行处理运算
        self.readTimeProcessing(CameraName)
        # 对预测结果进行处理
        self.readTime_visualize_yolopreds(CameraName,show,process)
结合人脸识别
之后的话,我们就可以结合人脸识别了。
其实仔细看一下这个上面的这个代码:
  def readTime_visualize_yolopreds(self,CameraName,show=False,process=None):
        """
        显示yolo预测的结果,绘制图像,咱们在这里进行逻辑处理
        在这里如果需要进行逻辑处理的话,在这里传入一个process方法
        这个方法需要接收三个参数,第一个参数是,当前的动作,另一个是当前对象的bounding box 已经image对象
        :param yolo_preds:
        :param id_to_ava_labels:
        :param color_map:
        :param save_folder:
        :return:
        """
        def visulize_readTime(CameraName,show=False,process=None):

            while(1):
                if(self.finish_process and self.read_process_data.empty()):
                    print("---计算处理完毕---")
                    break
                data = self.read_process_data.get()

                print("*"*100)
                print("正在处理实时结果,剩余:",self.read_process_data.qsize())
                print("*" * 100)
                yolo_preds = data[0]
                id_to_ava_labels = data[1]
                for i, (im, pred) in enumerate(zip(yolo_preds.ims, yolo_preds.pred)):
                    im=cv2.cvtColor(im,cv2.COLOR_BGR2RGB)
                    if pred.shape[0]:
                        for j, (*box, cls, trackid, vx, vy) in enumerate(pred):
                            if int(cls) != 0:
                                ava_label = ''
                            elif trackid in id_to_ava_labels.keys():
                                ava_label = id_to_ava_labels[trackid].split(' ')[0]
                                """
                                在这里得到动作信息和对应的bounding box
                                并且处理一些逻辑
                                """
                                if(process!=None):
                                    process(im,ava_label,box)
                            else:
                                ava_label = 'Unknow'
                            text = '{} {} {}'.format(int(trackid),yolo_preds.names[int(cls)],ava_label)
                            color = self.coco_color_map[int(cls)]

                            im = self.plot_one_box(box,im,color,text)
                    if(show):
                        cv2.namedWindow('camera', 0)
                        cv2.imshow('camera',im)
                        cv2.waitKey(1)
            folder_name_temp = DECTION_CONFIG.output + CameraName
            if (os.path.exists(folder_name_temp)):
                shutil.rmtree(folder_name_temp)

            print("!"*100)
            print("视频处理完毕!")
            print("!" * 100)
这里有一个process,其实就是你写你的处理函数的地方。
def detect_pose():

    pose = PoseRec()
    source_path = 0
    # pose.detect_form_video("Test01",True)
    pose.detect_from_video_realTime(source_path,"Test02",True,process=None)
你直接调用我们人脸识别模块的识别代码,然后放在process里面就好了。
总结
以上就是咱们全部的内容,其实给到这里就可以做很多事情了。
